
それでは早速、Ubuntu 20.04 LTSのイメージで作成したConoha VPSの上に、Wordpressが動作する環境を構築してゆきましょう。
必要パッケージのインストール
素のUbuntuなので、一つずつ構成要素をインストールしてゆく必要があります (参考ページ)。ハイライトされている行は、実際に自分で打つコマンド / 入力する値です。nginxは導入と同時に自動的に起動してしまいますが、設定が完了するまでは外部からのアクセスを受け付ける必要はないため、明示的に停止しておきます。
# WebサーバであるNginxの導入, 導入すると自動的に起動するので停止しておく.
% sudo apt-get install nginx
% sudo systemctl stop nginx

# MySQL互換のMariaDB、およびPHPからアクセスするためのライブラリの導入.
% sudo apt-get install mariadb-server php-mysql php-mbstring

# nginxでphpの利用を可能にするモジュールの導入, nginxと同じく自動起動するので停止する.
% sudo apt install php-fpm
% sudo systemctl stop php7.4-fpm.service
パッケージ毎の設定
まずMariaDBの初期セットアップを行います。DBは誤ってセットアップするといろいろ致命的なので、セキュアな設定を与えてくれるスクリプトを利用します。ちょっと長いですが大事な部分なので、すべてを引用します。
$ sudo mysql_secure_installation

NOTE: RUNNING ALL PARTS OF THIS SCRIPT IS RECOMMENDED FOR ALL MariaDB
      SERVERS IN PRODUCTION USE!  PLEASE READ EACH STEP CAREFULLY!

# MariaDBの設定変更のために必要なrootパスワードを入力する.
# MariaDBのインストール直後なので, そのままリターンを押下する.
In order to log into MariaDB to secure it, we'll need the current
password for the root user.  If you've just installed MariaDB, and
you haven't set the root password yet, the password will be blank,
so you should just press enter here.

Enter current password for root (enter for none):
OK, successfully used password, moving on...

# rootパスワードを設定する. 2回同じパスワードを入力する.
Setting the root password ensures that nobody can log into the MariaDB
root user without the proper authorisation.

Set root password? [Y/n] Y
New password:
Re-enter new password:
Password updated successfully!
Reloading privilege tables..
 ... Success!

# デフォルトで存在する匿名ユーザを削除する.
By default, a MariaDB installation has an anonymous user, allowing anyone
to log into MariaDB without having to have a user account created for
them.  This is intended only for testing, and to make the installation
go a bit smoother.  You should remove them before moving into a
production environment.

Remove anonymous users? [Y/n] Y
 ... Success!

# rootユーザのアクセス元をローカルホストに限定する.
Normally, root should only be allowed to connect from 'localhost'.  This
ensures that someone cannot guess at the root password from the network.

Disallow root login remotely? [Y/n] Y
 ... Success!

# デフォルトで作成されるテストデータベースを削除する.
By default, MariaDB comes with a database named 'test' that anyone can
access.  This is also intended only for testing, and should be removed
before moving into a production environment.

Remove test database and access to it? [Y/n] Y
 - Dropping test database...
 ... Success!
 - Removing privileges on test database...
 ... Success!

# ここまでの設定を反映するために権限テーブルを再読み込みする.
Reloading the privilege tables will ensure that all changes made so far
will take effect immediately.

Reload privilege tables now? [Y/n] Y
 ... Success!

Cleaning up...

All done!  If you've completed all of the above steps, your MariaDB
installation should now be secure.

Thanks for using MariaDB!
続いて、php-fpmの設定を行います。php-fpmはNginxから呼び出して利用することになるので、nginxユーザの権限で動作するように /etc/php/7.4/fpm/pool.d/www.conf という名前の設定変更を行います (20行目 & 42行目付近)。
; Unix user/group of processes
; Note: The user is mandatory. If the group is not set, the default user's group
;       will be used.
user = nginx
group = nginx

(中略)

; Set permissions for unix socket, if one is used. In Linux, read/write
; permissions must be set in order to allow connections from a web server. Many
; BSD-derived systems allow connections regardless of permissions.
; Default Values: user and group are set as the running user
;                 mode is set to 0660
listen.owner = nginx
listen.group = nginx
;listen.mode = 0660
順番が前後しますが、後述するnginxの設定の中で、/etc/php/7.4/fpm/php.ini にある cgi.fix_pathinfo を有効にする (コメントアウトされた状態でデフォルト値1が設定されている行のコメントを外して、0にする) ように書かれている記述を多く見かけるのですが、本来あるべき挙動はデフォルト値の方のようなので、とりあえずここでは何もしないこととします。
WordPressの導入と設定
続いて、Wordpress本体をダウンロード・展開します。ディレクトリ構成は移行元のお名前.com VPSの状態に従っています。
% cd /var/www
% sudo mkdir vhosts
% cd vhosts
% sudo mkdir starplatinum
% cd starplatinum
% sudo wget https://wordpress.org/latest.tar.gz
% sudo tar -xzvf latest.tar.gz
% sudo rm latest.tar.gz
% sudo mv ./wordpress/* ./
% sudo rm -rf ./wordpress
これで/var/www/vhosts/starplatinum/以下にWordpressの最新の構成ファイルが展開されたことになります。続いてWordpressが利用するデータベースを作成し、そのデータベースにアクセスできるユーザを作成します。これは移行元の設定に従う必要はありませんが、心配ならば移行元のWordpress導入ディレクトリにあるwp-config.phpの中に書かれていますので確認してください (管理人のはいかにも自動生成されたと思われるものが登録されていました)。大文字はコマンド部分、小文字は変数部分です。以下に含まれているユーザ名 / パスワードは当然ダミーなので、自分で決めた値を設定してください。
$ sudo mysql
Welcome to the MariaDB monitor.  Commands end with ; or \g.
Your MariaDB connection id is 61
Server version: 10.3.25-MariaDB-0ubuntu0.20.04.1 Ubuntu 20.04

Copyright (c) 2000, 2018, Oracle, MariaDB Corporation Ab and others.

Type 'help;' or '\h' for help. Type '\c' to clear the current input statement.

MariaDB [(none)]> CREATE DATABASE wordpress DEFAULT CHARACTER SET utf8 COLLATE utf8_general_ci;
Query OK, 1 row affected (0.001 sec)

MariaDB [(none)]> CREATE USER 'wp_user'@'localhost' IDENTIFIED BY 'wp_password';
Query OK, 0 rows affected (0.001 sec)

MariaDB [(none)]> GRANT ALL PRIVILEGES ON wordpress.* TO 'wp_user'@'localhost';
Query OK, 0 rows affected (0.001 sec)

MariaDB [(none)]> FLUSH PRIVILEGES;
Query OK, 0 rows affected (0.000 sec)

MariaDB [(none)]> exit
Bye
続いて、展開したファイルに含まれるサンプル設定ファイル wp-config-sample.php を wp-config.phpという名前で同じ場所にコピーしてから、そのファイルの次の部分を編集します。define…以下の部分はここにアクセスすると自動的に生成される値をそのまま Copy & Paste します。
// ** MySQL settings - You can get this info from your web host ** //
/** The name of the database for WordPress */
define( 'DB_NAME', 'wordpress' );

/** MySQL database username */
define( 'DB_USER', 'wp_user' );

/** MySQL database password */
define( 'DB_PASSWORD', 'wp_password' );

/** MySQL hostname */
define( 'DB_HOST', 'localhost' );

/** Database Charset to use in creating database tables. */
define( 'DB_CHARSET', 'utf8' );

/** The Database Collate type. Don't change this if in doubt. */
define( 'DB_COLLATE', '' );

(中略)

define('AUTH_KEY',         'tgt:VtxB_CR9-8JD; PTL+u/9jCNvobzK@`W)+|O#{.er=s8Tz KU.!>3@Jb%N4P');
define('SECURE_AUTH_KEY',  'KN+e9xwg-|&y5i7os4O+PkYN^*J9QA+mL=3x7j_B9DvTrqh|L]QxMw=/-e+D$T}/');
define('LOGGED_IN_KEY',    'x-WeL3+v!$4WP$%bl90CT*QsS%]nh+B(!VmDUF+7So}SErXZIr149+$%?2lP_~2/');
define('NONCE_KEY',        '/$p=_N3E||h&FkR`{<;fcPAES@lqDuIKB{vqajz kR>&#YUO.RK8Z2gF= nS6S{K');
define('AUTH_SALT',        '~b2@xb1b;Z73z|B_M#*|ct>7RXMO*qS!cb-,<L#@8*j =NoZME>pLql=b|5<:&?@');
define('SECURE_AUTH_SALT', '!c =A@k2,k1-PS<;QPx3/?S|`H(Z6dpWvwC*.y5(@+I$#|v!Q^Wp4SB{X_RwX&d8');
define('LOGGED_IN_SALT',   '2W3qlO{OT2r9|gE[r*>L)1><oP21~g~gKb2Ev[4:,DkR%K<|ud;kz :+9mFN}6]?');
define('NONCE_SALT',       'u=x0ZI|&bFL9o3A7lx.-NKR k#,LQcocv3>t`GNAKa`2_T87>W`kZMioOpWX|0<2');
nginxの設定
続いてもっとも難しい?nginxの設定を行います。ググると様々な設定例が出てきますが、ここではもっともベーシックと思われる WordPress.org が公開しているサンプルを参考に設定を行います。
まず、/etc/nginx/nginx.conf です。同名のファイルがありますが、別名で退避しておきましょう。サンプルから変更が必要なのは30行目と36行目で、前者には移行元サイトのデータの容量を十分に上回るサイズを (以下の例では256MB)、後者には自分の環境の /etc/php/7.4/fpm/pool.d/www.conf の値を正しく反映した値を設定してください。
# 一般的なスタートアップファイル.
user nginx nginx;

# CPUの数は,"grep processor /proc/cpuinfo | wc -l"の結果と合わせる.
worker_processes  auto;
worker_cpu_affinity auto;

error_log  /var/log/nginx/error.log;
pid        /var/run/nginx.pid;

# bind()できないメッセージは保存しない.
#daemon     off;

events {
    worker_connections  1024;
}

http {
#   rewrite_log on;

    include mime.types;
    default_type       application/octet-stream;
    access_log         /var/log/nginx/access.log;
    sendfile           on;
#   tcp_nopush         on;
    keepalive_timeout  3;
#   tcp_nodelay        on;
#   gzip               on;
    #php max upload limit cannot be larger than this
    client_max_body_size 256m;
    index              index.php index.html index.htm;

    # 抽象化されたバックエンド接続へのアップストリーム, PHP向けの設定.
    upstream php {
        #この値はphp-famプールの"listen"ディレクティブの値と一致しなければならない.
        server unix:/run/php/php7.4-fpm.sock;
#       server 127.0.0.1:9000;
    }

    include sites-enabled/*;
}
続いて個別サイトの設定です。サンプルでは複数のサイトでの設定ファイルの使いまわしを想定して、 /etc/nginx/ の下にサブディレクトリ (/globalとか) を作成してそこにファイルを置くことにしていますが、今回は単一向けということで、nginx.conf の最後でincludeされている sites-enabled に直接設定ファイルを置くこととします。
このため、サンプルにある “Per Site configuration” と “Global restriction file” と “General wordpress rule” の内容を一つにまとめて、/etc/nginx/sites-enabled/(サイト名).confというファイルに突っ込むことにします。また、Global wordpress ruleはNginx公式サイトに更新版があるとのことなので、そちらを参照します。まとめる過程で階層構造を一部変更した、あるいは重複部分を削除した部分があるので注意してください。
7行目と13行目がコメントアウトされ、別のホスト名が設定されていますが、これは最終的なホスト名となるwww.starplatinum.jp (本ドメイン) はまだお名前.com VPSが持っており、この名前でConoha VPSにアクセスすることができないためです。厳密にいえば接続元のhostsファイルを設定すればアクセス自体はできますが、ChromeやSafariなどでは警告が出て実質アクセスできませんでした。ブラウザに表示されたエラーメッセージによるとHSTS (HTTP Strict Transport Security)が働いているようですが、回避方法がわからなかったので (そもそもSSLの設定を現在導入中のホストではまだ行っていない)、Conohaのコントロールパネルで確認できる自動的に割り当てられているホスト名を一時的に設定しています。
なお、デフォルトで置かれている /etc/nginx/sites-enabled/default は削除してください (ファイルの実体はsites-availableに残っているのでリカバリは可能です)。
# *** Per Site Configuration ***
# すべてをメインサイトにリダイレクトする.
# ifステートメントは利用せず, 個別のserverステートメントで定義する.
# 理由は http://wiki.nginx.org/IfIsEvil を参照.
server {
        server_name  _;
        # return 302 $scheme://v160-251-76-216.k2a5.static.cnode.io$request_uri;
        return 302 $scheme://v160-251-76-216.k2a5.static.cnode.io$request_uri;
}

server {
    # server_name starplatinum.jp;
    server_name v160-251-76-216.k2a5.static.cnode.io;
    root /var/www/vhosts/starplatinum;

    index index.php;

    # include global/restrictions.conf;

    # 追加ルールを書く場合はここに書く.

    # 以下のファイルのうち, 一つだけをincludeすること.
#    include global/wordpress.conf;
#    include global/wordpress-ms-subdir.conf;
#    include global/wordpress-ms-subdomain.conf;
}

# *** Global restriction file ***
# 全体的な制限設定.
# 任意の server {} ブロックで動作するように書いている.
location = /favicon.ico {
    log_not_found off;
    access_log off;
}

location = /robots.txt {
    allow all;
    log_not_found off;
    access_log off;
}

# .htaccessや.htpasswd, .DS_Store (Mac)など、隠しファイルに対するアクセスを拒否する.
# 追跡可能にする (あるいはfail2banのようなファイアウォールツールに渡す) ため, ログは取得する.
location ~ /\. {
    deny all;
}

# uploadsディレクトリにある.phpの拡張子を持つ任意のファイルへのアクセスを拒否する.
# サブディレクトリに置かれたファイルやマルチサイトでも動作する.
# 追跡可能にする (あるいはfail2banのようなファイアウォールツールに渡す) ため, ログは取得する.
location ~* /(?:uploads|files)/.*\.php$ {
    deny all;
}

# *** Global wordpress rule ***
# シングルサイトなWordPressサイト向けのルール.
# https://www.nginx.com/resources/wiki/start/topics/recipes/wordpress/ を参照.
# 重複部分は削除している

 server {
        location / {
                # 静的なコンテンツを触るphpはないので, 入れるべき設定.
                # 通常と異なる形式のpermlinkがクエリストリングを利用する場合は, "?$args"の部分を含める.
                try_files $uri $uri/ /index.php?$args;
        }

        location ~ \.php$ {
                # 注意 : php.iniで"cgi.fix_pathinfo = 0;"と設定しておくこと.
                include fastcgi_params;
                fastcgi_intercept_errors on;
                fastcgi_pass php;
                # 以下のパラメーターはfastcgi_paramsでincludeされていてもいい.
                fastcgi_param  SCRIPT_FILENAME $document_root$fastcgi_script_name;
        }

        location ~* \.(js|css|png|jpg|jpeg|gif|ico)$ {
                expires max;
                log_not_found off;
        }
}
nginxの実行ユーザの作成
順番が前後しますが、Nginxの実行ユーザnginxを作成し、そのユーザ権限でログファイルの書き込みができるように権限設定をしておきます。もしすでにディレクトリ and/or ログファイルがあったら、ファイルは削除してしまいましょう。また、プラグインの導入や更新など、Wordpressはファイルシステムに対して様々な操作を行います。これらの操作はWebサーバ = nginxの実行ユーザ権限で行われるので、Wordpressの導入ディレクトリをnginxユーザが操作できるようにグループとユーザを変更しておきます。
% sudo useradd --shell /usr/sbin/nologin nginx
% sudo rm /var/log/nginx/*
% sudo chgrp nginx /var/log/nginx
% sudo chown nginx /var/log/nginx
% sudo touch /var/log/nginx/access.log
% sudo touch /var/log/nginx/error.log
% sudo chgrp nginx /var/log/nginx/*
% sudo chown nginx /var/log/nginx/*
% sudo chgrp -R nginx /var/www/vhosts/starplatinum/
% sudo chown -R nginx /var/www/vhosts/starplatinum/
動作確認
ここまでの設定ができたら、Nginxの設定が正しいかどうかテストしてみます。
% sudo nginx -t
nginx: the configuration file /etc/nginx/nginx.conf syntax is ok
nginx: configuration file /etc/nginx/nginx.conf test is successful
問題がなければ、続いてphp-fpmの再起動を行います (インストールした時点デフォルトのユーザ名 = www-dataで起動しているため)。再起動後、念のため正常に起動していることを確認します。
% sudo systemctl restart php7.4-fpm.service
% sudo systemctl status php7.4-fpm.service
● php7.4-fpm.service - The PHP 7.4 FastCGI Process Manager
     Loaded: loaded (/lib/systemd/system/php7.4-fpm.service; enabled; vendor preset:>
     Active: active (running) since Tue 2021-02-23 21:15:39 JST; 1min 6s ago
       Docs: man:php-fpm7.4(8)
    Process: 16862 ExecStartPost=/usr/lib/php/php-fpm-socket-helper install /run/php>
   Main PID: 16847 (php-fpm7.4)
     Status: "Processes active: 0, idle: 2, Requests: 0, slow: 0, Traffic: 0req/sec"
      Tasks: 3 (limit: 1074)
     Memory: 7.3M
     CGroup: /system.slice/php7.4-fpm.service
             tq16847 php-fpm: master process (/etc/php/7.4/fpm/php-fpm.conf)
             tq16860 php-fpm: pool www
             mq16861 php-fpm: pool www

Feb 23 21:15:39 160-251-76-216 systemd[1]: Starting The PHP 7.4 FastCGI Process Mana>
Feb 23 21:15:39 160-251-76-216 systemd[1]: Started The PHP 7.4 FastCGI Process Manag>
特に問題なく起動しているようです。最後に、nginxを起動します。
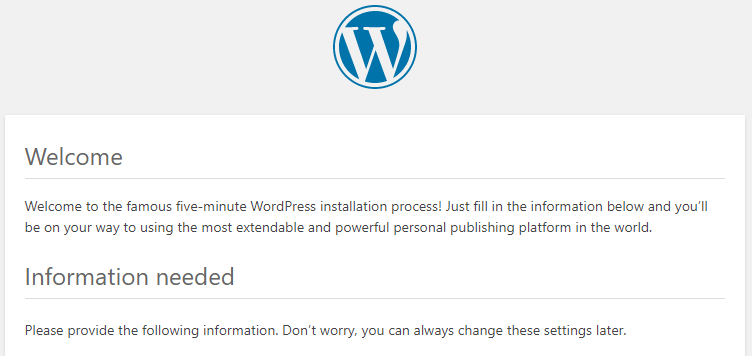
% sudo systemctl start nginxブラウザから /etc/nginx/sites-enabled/(your_site).conf に設定されているホスト名にアクセスします (パスは不要)。正しく設定が行われていれば、リダイレクトが発生してWordpressの設定画面が表示されるはずです。
次のエントリでは、データの移行を行います。